Tanks
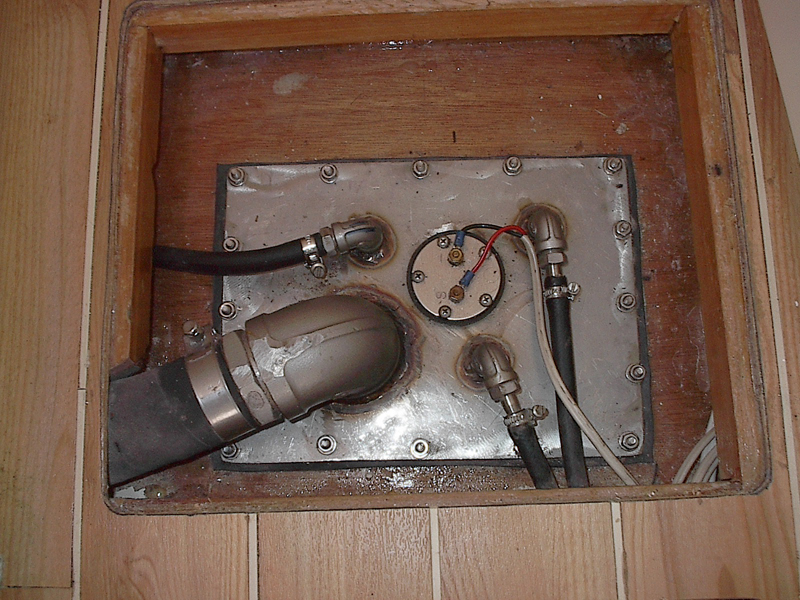
Things are really getting along now, I had mounted, or was going to mount the engines a little further aft than the drawings specified. This does move some weight further aft, just where we don't want it but liked the idea. To offset this somewhat I moved the fuel tanks a little further forward than was shown in the drawing. Hey it seemed to work. Now if you have mini keels on your boat - use them as water tanks. I did and they hold around 350 litres each, which is okay if you don't have a water maker. Fuel tanks I was going to get built of stainless but after a little research just built them into the hulls using the hulls as 2 of the sides and some 13mm ply for the fore and aft sides, yep top was built from the same thickness. You will need to baffle up the tanks well, I used 6mm ply every 300mm across and one piece down the centre. Not that sure but think each tank holds about 250 litres. One in each hull, just forward of the main bulkhead. Now I know what you are thinking - that is plywood is not that waterproof or diesel proof. You need to coat every surface with at least 5 coats of epoxy resin, every bit - don't miss a bit, this needs to be done before the tank top is fitted to ensure you can get access. The fuel tank top I had manufactured of stainless with a 50mm intake for filling, a small outlet and return for diesel and a small fitting for the venting, as well as a hole for the fuel sender unit.
As well as the fuel and water tanks I installed a 2 waste tanks in each hull, 2 for grey waste and 2 for black waste. The grey waste tanks I did not vent as I considered the top of the tank would be open anyway by virtue of the fact that it was connected to a sink or shower outlet.
Considerations and things learnt
- Think about how you are going to fill the fuel and water tanks and where the deck fillers and piping is going to run, inside full hieght cupboards is good.
- Think about how you are going to vent the tanks that need it - drinking water, fuel and black waste.
- Don't put the tops of the tanks too close to the underside of the floors, if you do you will have problems with fall with water from the shower and fittings fouling floor supports
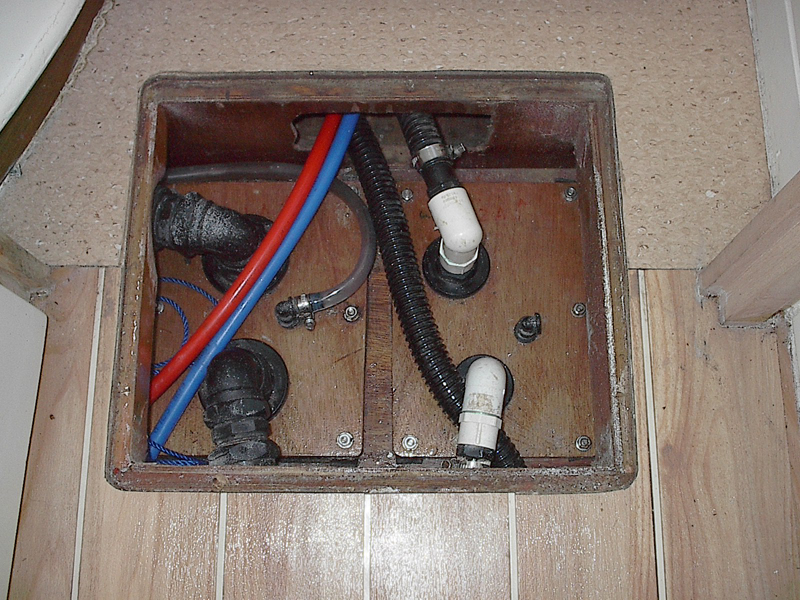
- Use cheap plastic reticulation fittings for water tanks and filling connections under the floors, strong and readily available
- Put heaps of thoughts - before you put the floors down on how you are going to get cables and pipes in after the floors are down. I simply glassed a shelf to the side of the hull to take cables and pipes etc. Not good enough. Next time I'll build a easy access able trunking with heaps of room incorporating channels for DC, AC, water and maybe data (electronics).
- Put in all your pumps and piping that you can before the floors go down, but probably after the floor supports go in.
Floors and Hatches
Built mine (as per plan) of 9mm ply. Hatches were 400mm wide and positioned so I had access to every bit of the hulls. Side supports were 42mm * 19mm glassed to the hulls, cross supports were the same which ran across the edges of the hatch openings, longitudinal members were the same - don't think I have a pic of this. It did not take me long to realise that this was not going to be strong enough and had to glue thin wide 4mm ply to the cross pieces to stiffen the whole thing up. Really not sure what the best way to do this, will check a few other boats out when I have chance. In addition I glassed the underside for the ply floors to strengthen them, this does increase the weight somewhat.
One thing I have read about is that its possible to make the floor a structural part of the hull construction and this may be worth some additional research. If your under floor is sealed with the floor itself and you get a holed below the waterline, well a few screws and a bit of Sika around the hatch lids, and you have a waterproof - or close to waterproof second skin - lets hope you never need it but worth some thought and certainly a keep you afloat, or get you home option.